Skip to content

Orla Love Bag

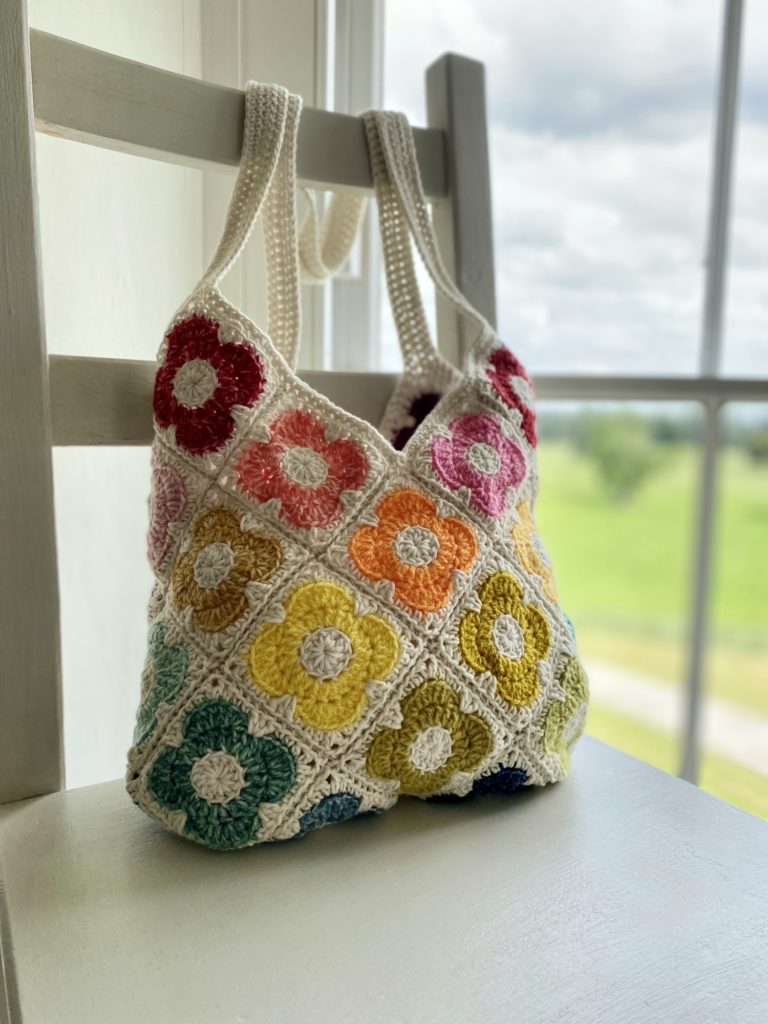
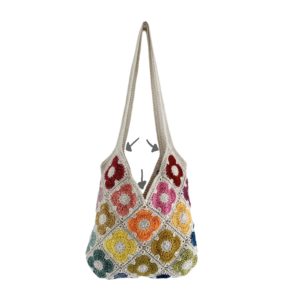
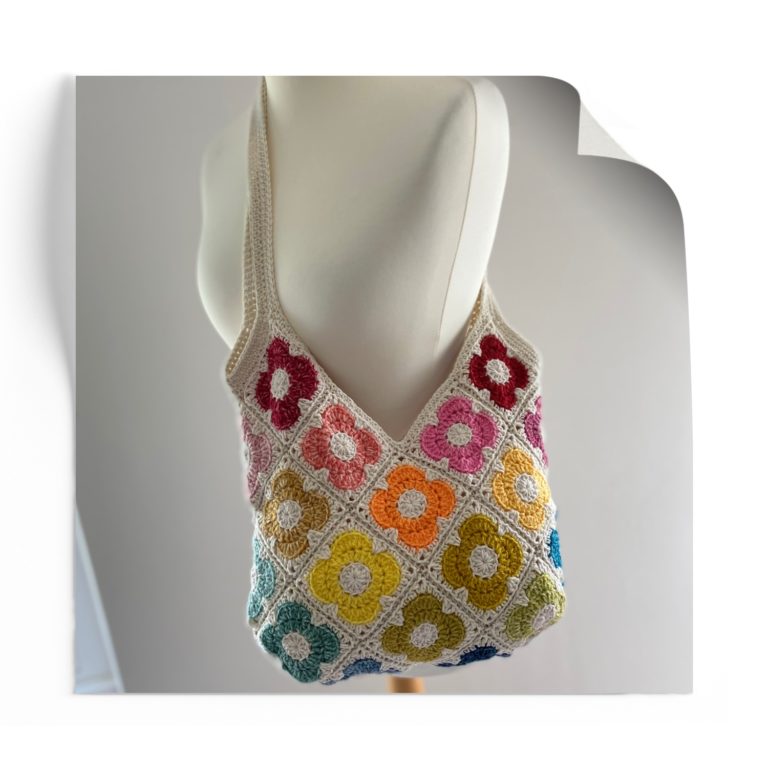
My favourite square! This is my go to summer bag.  

Project Details

Easy

This pattern is written in US Crochet Terminology and uses standard Crochet Abbreviations.

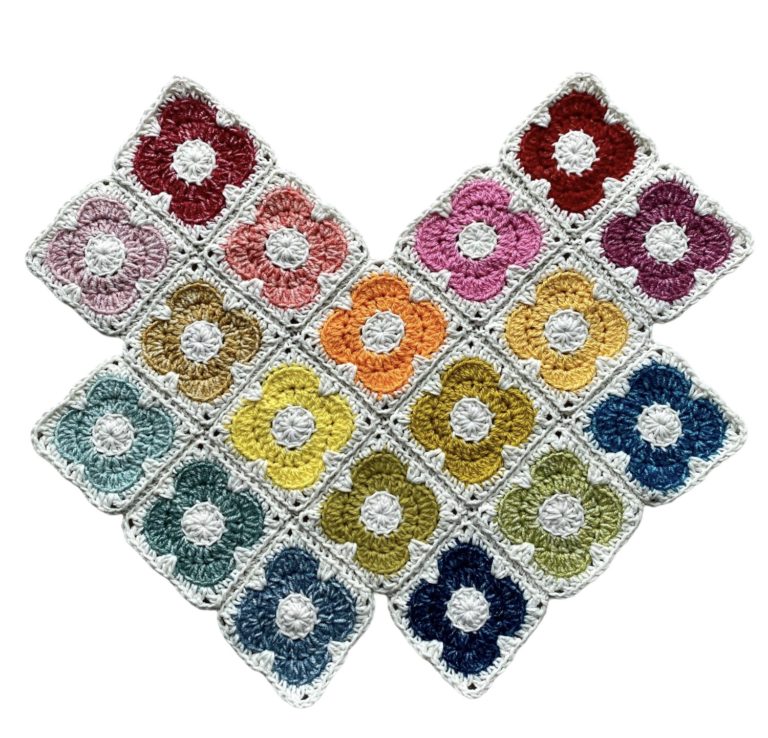
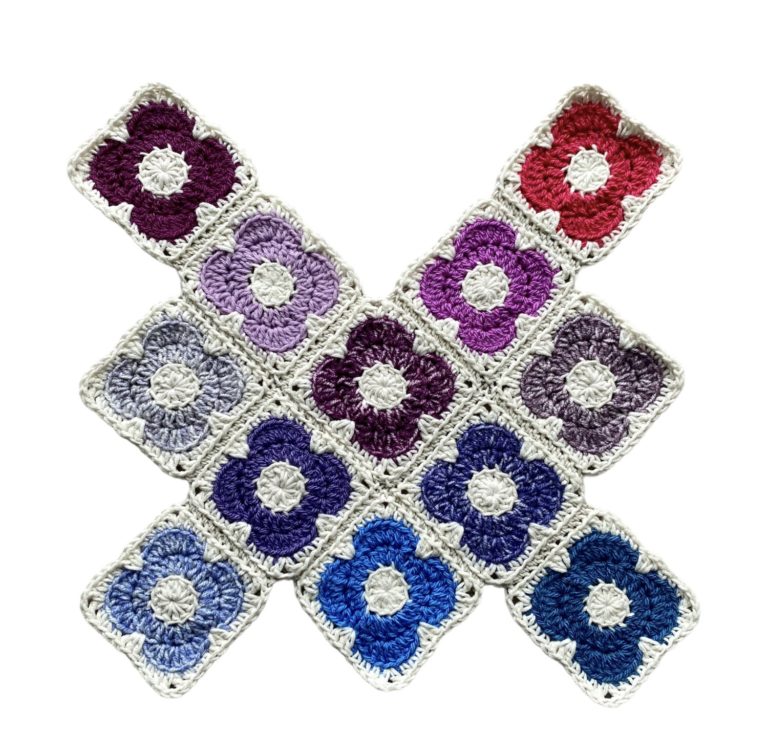
I made my Orla squares using cream Scheepjes SoftFun (I think I used approx 2 balls), and I crocheted the flowers in Stylecraft Batik and Stylecraft Special DK.  I crocheted my squares together with some 4 ply light grey cotton.

I used a 4 mm crochet hook.

Description

  • Begin by making 30 Orla Love Squares.  Pattern is here.
  • Feel free to join your squares anyway you prefer, but I crocheted my squares together by holding them right sides together and working a row of sc through the back loops of the squares with 4 ply light grey cotton yarn. (You don’t need to use 4 ply yarn.  I used it because I wanted the effect of a channel between my squares for definition).
  • Using the pictures below as a guide join the front 18 squares, and the back 12 squares.

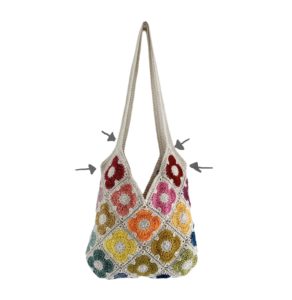
Place the back on top of the front, right sides together.  Ignoring the 4 top squares, join the front to the back, folding the 6 extra squares on the front in half as you go to form a bag. (This is fiddly in parts I know, but worth it!!)

To make the handles...

  • With the back, right side towards you, join your cream yarn into the back loop of one of the Sts on the right side of the top right square.
  • Work sc in each st up to the top corner.  1sc in ch sp, then work 110ch.  Being careful not to twist the ch Sts work a sc into the top ch sp of the left hand top square; sc in the back loops down the side of the square, 1sc in ch loop of side square, the sc up the back loops of the top right hand square of the front;
  • 1sc in ch sp, then work 110ch.  Being careful not to twist the ch Sts work a sc into the top ch sp of the left hand top square; sc in the back loops down the side of the square, 1sc in ch loop of side square, the sc up the back loops of the square you started in. Don’t join with a sl st, but mark the st with a marker and carry on working directly into top of the 1st st (as in amigurumi).
  • Work 3 more rows of sc; at the same time decrease a st (by missing a st) at each indent on your rows – shown by the arrows in the picture below. (this doesn’t need to be completely precise, just eyeball where the bend is most acute).
  • Fasten off with an invisible join and weave in end.
  • To work the inside of the 1st handle join yarn to the back loop of one of the squares and continue around just like before, this time working the decreases as shown below and working 2 rows in total before fastening off with an invisible join.
  • Repeat with the other handle.