This pattern is written in US Crochet Terminology and uses standard Crochet Abbreviations.
You will need…
Aran weight yarn (ideally cotton) in at least 5 colours –
Hair Colour – A
Face Colour – B
Background Colour – C
Glasses Frames Colour – D
Glasses Lens Colour – E
Cushion Back Colour – Can be the same as one of the colours already used.
I used mainly Drops Paris Yarn, I did the cushion back in a different colour and I used less than a ball of each.
A small amount of 4 ply yarn for the mouth.
Size 5 mm and 3 mm crochet hooks.
Fabric and stuffing for cushion pad.
Sewing and wool needle and scissors.
Description
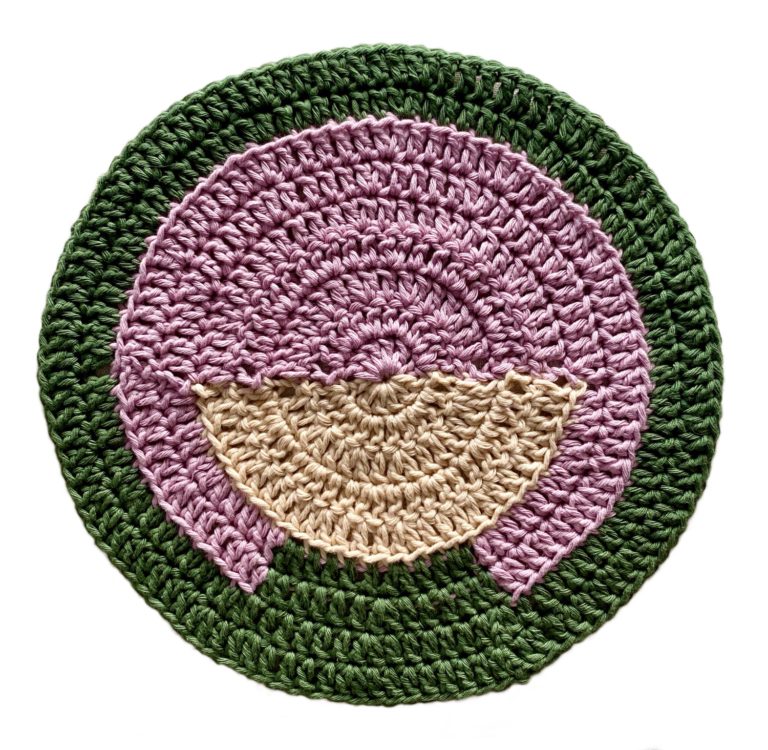
Cushion Front
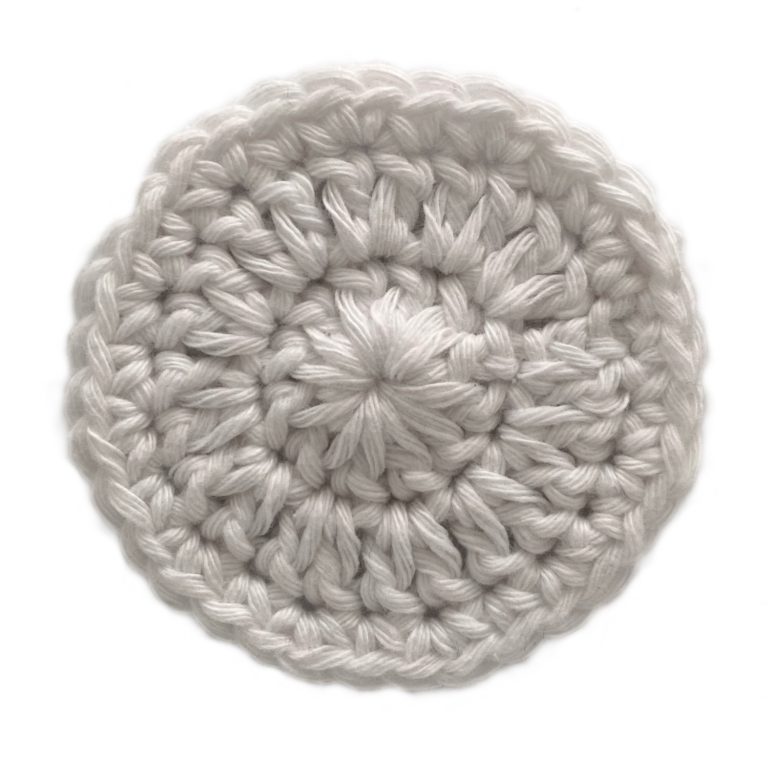
With colour B and 5 mm hook make an adjustable loop.
Ch3, 5 dc into loop. Draw up loop and drop it. Join colour A to the adjustable loop, ch3, 5 dc into loop. Draw up loop and drop it.
Draw up adjustable loop and fasten off.
Put colour B dropped loop back on hook; join to top of colour A (with a sl st), turn, ch 3, dc in same st, 2 dc into each of the remaining 5 Sts. Draw up loop and drop.
Put colour A dropped loop back on hook; join to colour B, ch 3, join to top of colour B, turn, dc in same st, 2 dc into each of the remaining 5 Sts. Join to colour B, Draw up loop and drop.
Put colour B dropped loop back on hook; turn, [3ch, 1dc into same st, 1dc]; then [2 dc into next st, 1dc] 5 times. Draw up loop and drop.
Put colour A dropped loop back on hook; ch3, join to top of colour B; turn, 1dc in same st, 1dc; then [2 dc into next st, 1dc] 5 times. Join to top of colour B, Draw up loop and drop.
Continue as established for another 2 rounds joining at both ends with colour A and increasing as follows –
Round 4, *(2dc in next st) 2dc, rep from * 5 more times in each colour.
Round 5, *(2dc in next st) 3dc, rep from * 5 more times in each colour. Sl st into next st. Fasten off colour B.
Don’t worry too much about your joins – they will be covered eventually by her glasses.
Note for the next row – it’s a nice finish to work into the back loops only around the face.
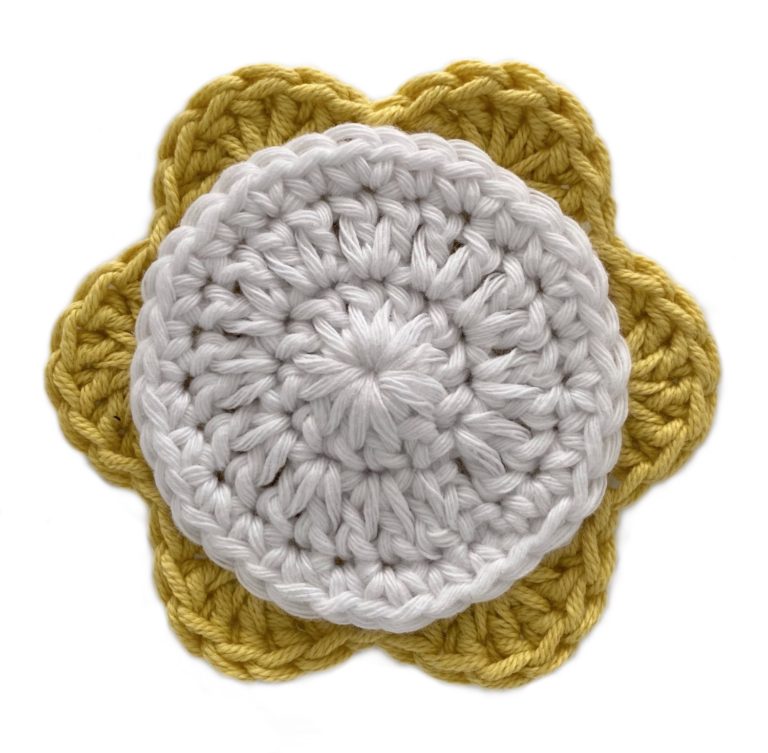
Continuing in A, 3ch, dc in same st, 4dc, (2dc in next st) 4dc; join colour C, [(2dc in next st) 4dc] twice; rejoin colour A,[(2dc in next st) 4dc] 8 times. Join to 1st dc with a sl st.
3ch, dc in same st, 5dc; [(2dc in next st) 5dc] once, (1dc A and 1dc C) in next st, continuing in C 5dc,[(2dc in next st) 5dc] once, (1dc C and 1dc A) in next st; continuing in A, 5dc, [(2dc in next st) 5dc] 7 times more. Sl st and fasten off A.
Note for the next row – it’s a nice finish to work into the back loops only around the hair.
Rejoin colour C (wherever you dropped it…) and
Ch 3, dc in same st, 6dc; [(2dc in next st) 6dc] 11 times. Join with a sl st.
Ch 3, dc in same st, 7dc; [(2dc in next st) 7dc] 11 times. Join with a sl st. Fasten off.
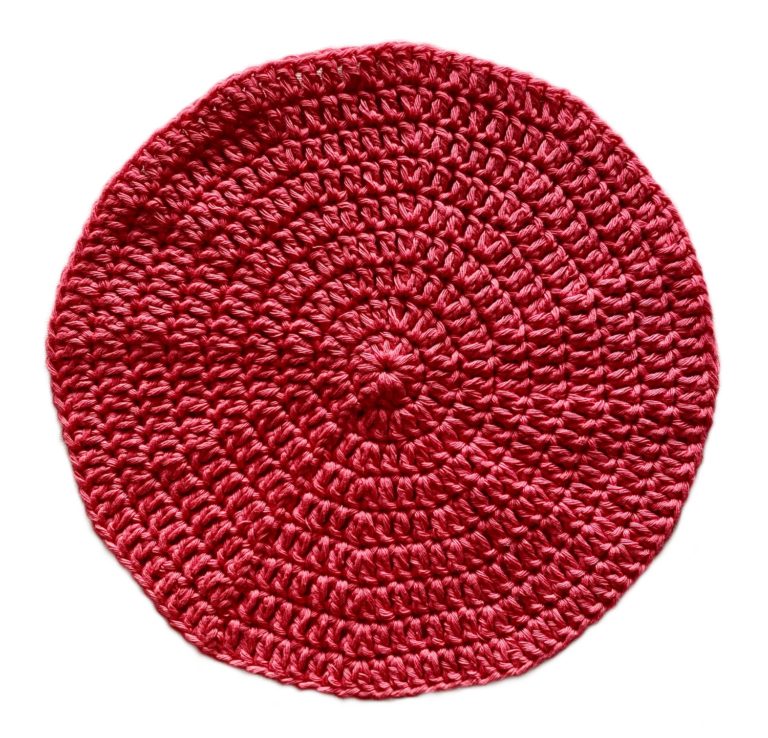
Cushion Back
Working in one colour (or any combination you like!) and substituting ch3 for every 1st dc in the round work as follows –
Round 1 – make an adjustable loop, 12 dc, sl st.
Round 2 (2dc in next st) 12 times. sl st.
Round 3 – [(2 dc in next st) 1dc] 12 times. sl st.
Round 4 – [(2 dc in next st) 2dc] 12 times. sl st.
Round 5 – [(2 dc in next st) 3dc] 12 times. sl st.
Round 6 – [(2 dc in next st) 4dc] 12 times. sl st.
Round 7 – [(2 dc in next st) 5dc] 12 times. sl st.
Round 8 – [(2 dc in next st) 6dc] 12 times. sl st.
Round 9 – [(2 dc in next st) 7dc] 12 times. sl st. Fasten off.
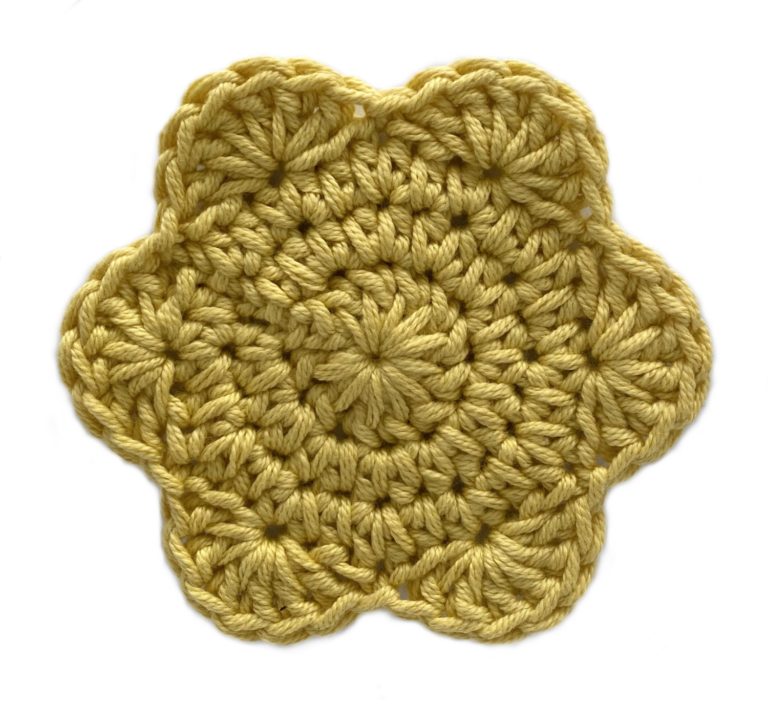
Glasses Frame - make 2
With colour D make an adjustable loop, ch3, 11 dc into loop, sl st into top of ch 3. Draw up loop.
Ch 2 (not counted as a st), (2hdc in next st) 12 times; sl st into top of 1st hdc.
Ch 2 (not counted as a st), [(2hdc in next st) 1hdc] 12 times; sl st into top of 1st hdc.
(miss 2 Sts, 6 dc into next st, miss 2 Sts, sl st into next st) 6 times working the last sl st in same st as you started. Fasten off.
Glasses Lens - make 2
With colour E make an adjustable loop, ch3, 11dc, join with sl st to top of ch3, pull up loop and fasten off.
Ch 3, dc in same st; [2dc in next st] 11 times. Sl st into ch3.
ch1 (not counted as a st), [1sc, (2sc in next st)] 12 times. Sl st into 1st sc. Fasten off.
Lips
With some 4 ply yarn in your chosen lipstick colour and a 3 mm hook, make an adjustable loop.
Ch 1, 2hdc, sc, 2ch, sc, 2hdc, ch 1, sl st into loop.
Pull up loop and fasten off.
Cushion Pad
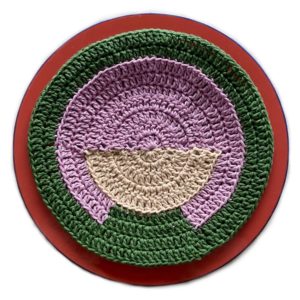
You need to cut two circles of fabric approximately 1.5/2 cms larger around than your front piece. I used a plate as a template.
You want to aim for your sewn cushion to still be slightly larger than your cushion front as it will stretch.
Put fabric pieces together and sew around with a 1cm seam, leaving a gap big enough to get your hand in for turning and stuffing. I have a machine, but it wouldn’t take long to backstitch around by hand.
Turn cover to right way around and stuff firmly.
Hand sew the gap together and fasten off.
If you don’t have fabric and stuffing you could use an old (washed) microfibre pillow (not feather!), using the cover for your fabric and raiding the stuffing inside for your cushion…
Making Up Your Cushion
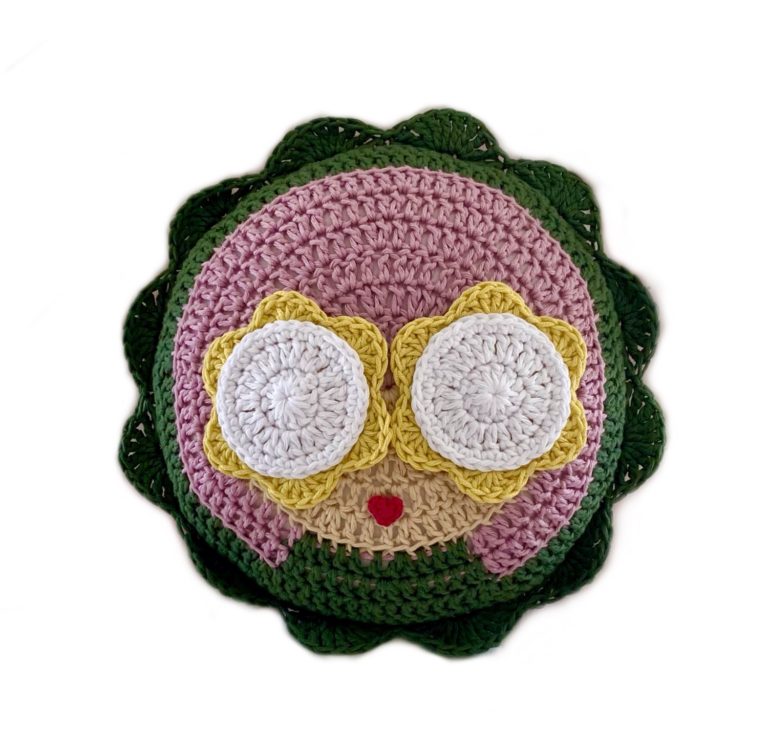
Assembling the Face
My cushion is for decoration only and so I used a hot glue gun to to stick the glasses pieces together and then stick the glasses and lips to the face. But if your cushion needs to withstand wear and tear, kids and pets, you will need to sew these pieces on.
When the front and back of the cushion are attached with the cushion pad inside, the stitches of the face and hair will stretch slightly. This means that if you sew the face on before you make up the cushion the face will look different when stretched – and face placement is so important. So I strongly suggest that you sew the glasses closer together on the face if this is done before the cushion pad is inserted. Even better stick or sew the face on after the cushion pad is inserted and you have a stable face!
So bearing all that in mind…
Stick, or sew the lens centrally to the glasses frames. Sticking them together has the huge advantage that there are no puckers and dents from sewing!
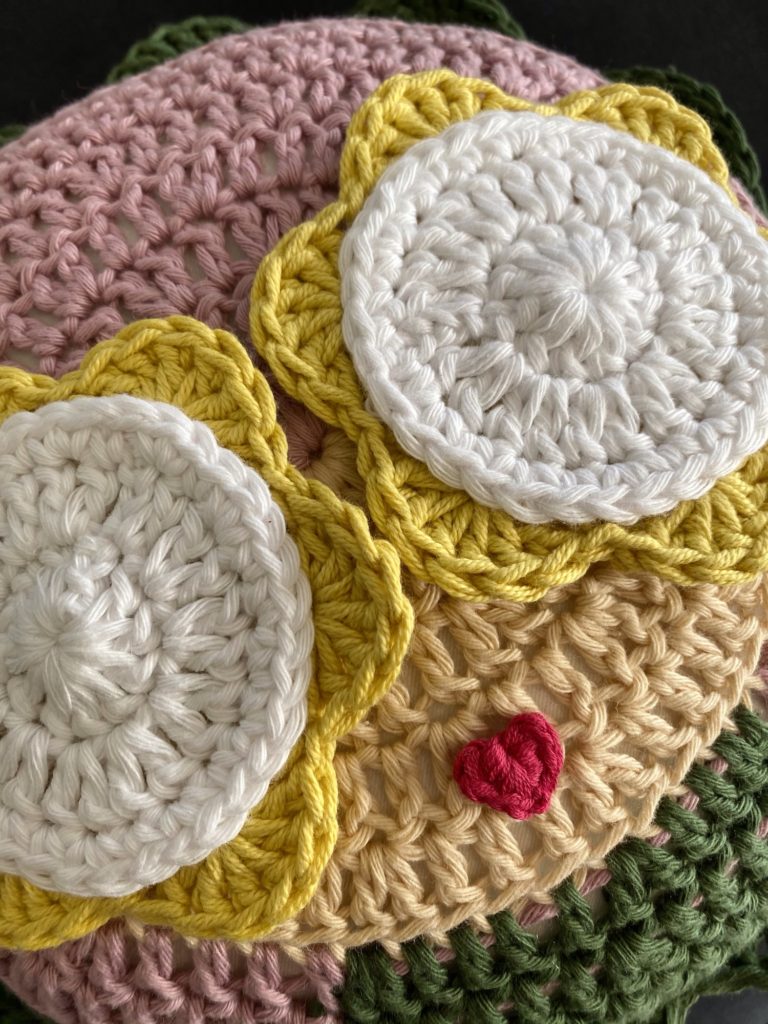
When placing the sunglasses on the face they should ideally be slightly below the centre of the face – if you put them too high the proportions of the face will look odd. Similarly the lips will look best if the bottom point is no lower than the bottom of the stitches on the final round of the face (if that makes sense!! See photo below for reference)
Attaching the cushion front and back
Place cushion front and back wrong sides together. With colour C join, ch1, then work 1sc in each st around joining them and enclosing the cushion pad. Work the final sc in same st as 1st ch1. Sl st into 1st sc.
Now the outer scalloped edge is super awkward to crochet – but worth it if you can stand it 🙂
*Miss 3 Sts, (4tr in next st) twice, miss 3 Sts, sl st into next st; rep from * 11 times more. Fasten off.